How to Point Your EVOS Charger to a Home Assistant OCPP Endpoint
Chris Crossman
How to Connect Your EVOS Charger to Home Assistant
EVOS chargers can be connected to Home Assistant using OCPP, allowing advanced users to monitor and automate charging inside their smart home setup.
This guide explains how to set up the OCPP service in Home Assistant, find your OCPP URL, and send the required details to EVOS so we can point your charger to your Home Assistant system.
Before You Start
You will need:
An EVOS charger connected to the internet
Home Assistant running on your home network
HACS installed in Home Assistant
The Home Assistant OCPP integration installed
Your EVOS charger serial number
Your Home Assistant OCPP URL
Important: Home Assistant integration is intended for advanced users who are comfortable managing their own smart home system and local network.
Step 1: Install HACS in Home Assistant
The OCPP integration is installed through HACS, which stands for Home Assistant Community Store.
If you already have HACS installed, you can skip this step.
If not, follow the HACS installation instructions for your Home Assistant setup, then restart Home Assistant once HACS has been installed.
Step 2: Install the OCPP Integration
In Home Assistant:
Open HACS
Go to Integrations
Select Explore & download repositories
Search for OCPP
Select the OCPP integration
Install it
Restart Home Assistant
After Home Assistant restarts, the OCPP integration will be available to add.
Step 3: Add the OCPP Integration
In Home Assistant:
Go to Settings
Select Devices & services
Select Add integration
Search for OCPP
Add the OCPP integration
You will now be asked to configure the OCPP central system.
Step 4: Configure the OCPP Service
Use the following settings unless you have a custom network setup:
Host:0.0.0.0
Port:9000
Secure connection:
Leave this disabled unless you have specifically configured Home Assistant with HTTPS/SSL and know you need a secure WebSocket connection.
Central system identity:
You can leave this as the default value, usually:central
Charge point identity:
You can leave this as the default value, usually:charger
Once saved, Home Assistant will start listening for an OCPP charger connection.
Step 5: Find Your Home Assistant OCPP URL
Your EVOS charger needs to know where to connect.
The OCPP URL is usually based on your Home Assistant local address, but using port 9000 instead of the normal Home Assistant web interface port.
For most users, the format will be:
ws://homeassistant.local:9000
If your Home Assistant is accessed by local IP address, the format will be:
ws://YOUR-HOME-ASSISTANT-IP:9000
Example format only:
ws://192.168.1.50:9000
Do not copy this example unless it is your actual Home Assistant IP address.
How to Work Out Your OCPP URL
If you normally access Home Assistant in your browser using:
http://homeassistant.local:8123
Then your OCPP URL is likely:
ws://homeassistant.local:9000
If you normally access Home Assistant using an IP address, such as:
http://192.168.1.50:8123
Then your OCPP URL is likely:
ws://192.168.1.50:9000
The key change is:
Replace
http://withws://Replace port
8123with port9000
If you have configured secure HTTPS access and enabled secure connection in the OCPP integration, your URL may use:
wss://
instead of:
ws://
Most local Home Assistant setups will use ws://.
Step 6: Send Your Details to EVOS
Once your Home Assistant OCPP service is set up, send EVOS the following details:
Your EVOS charger serial number
Your Home Assistant OCPP URL
Please send the details in this format:
Charger serial number:EVOS-XXXXXXXX
Home Assistant OCPP URL:ws://YOUR-HOME-ASSISTANT-ADDRESS:9000
EVOS will use these details to update the OCPP connection settings on your charger.
Step 7: Confirm the Charger Has Connected
After EVOS has updated your charger settings, check Home Assistant.
In Home Assistant:
Go to Settings
Select Devices & services
Open the OCPP integration
Check whether your charger has appeared as a device
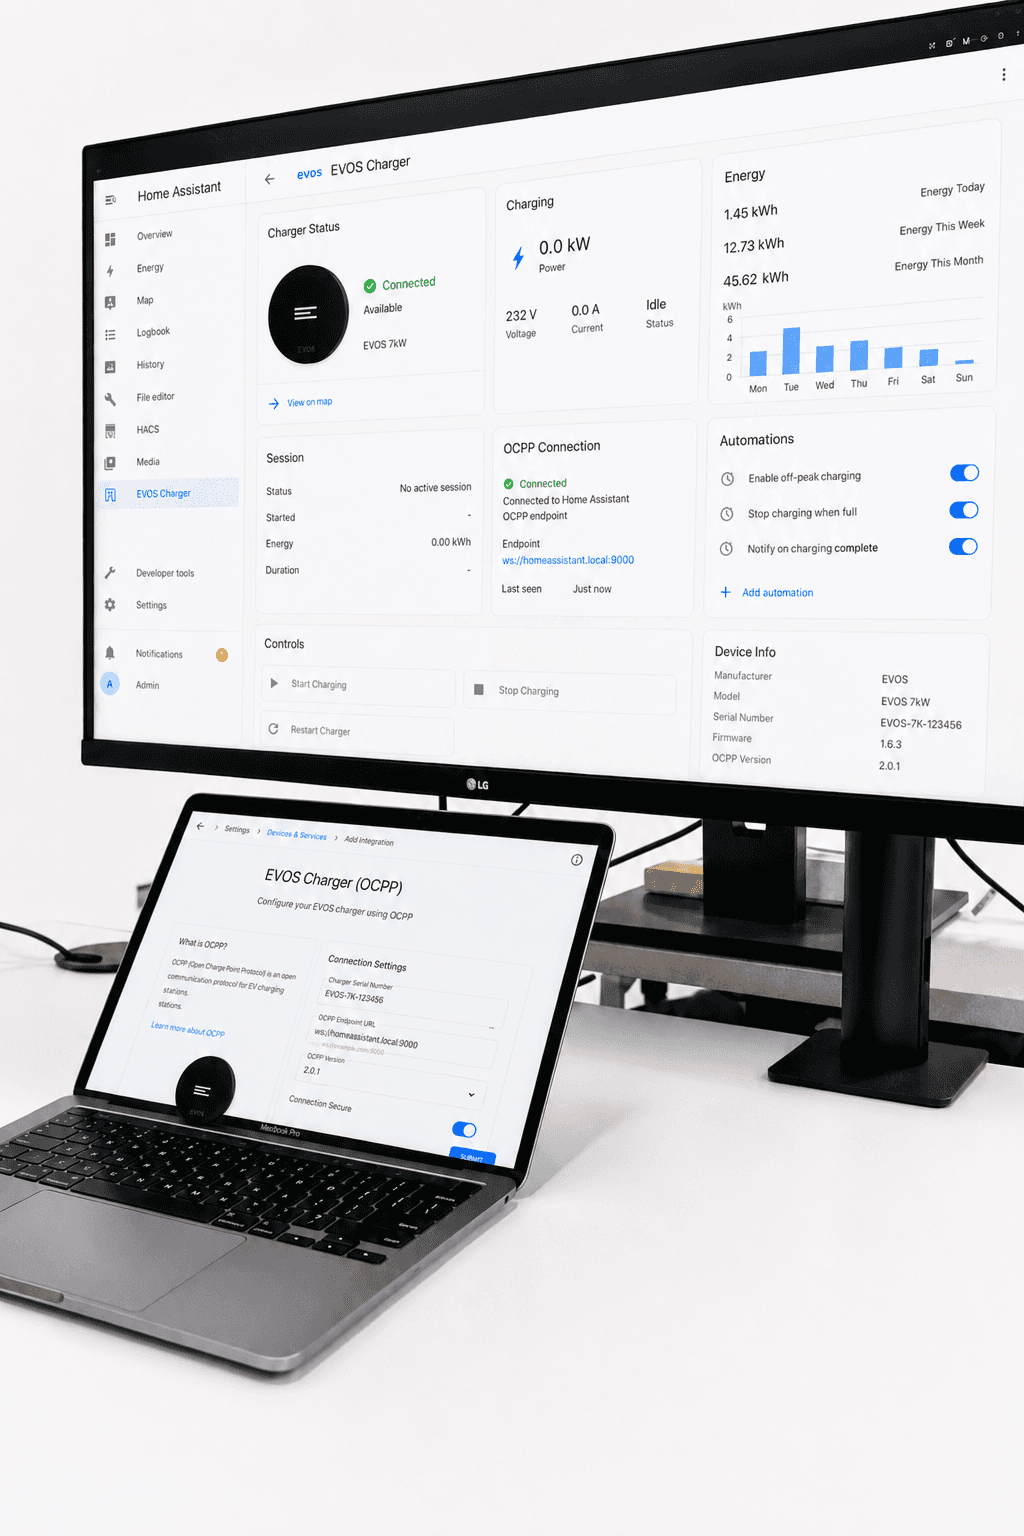
Once connected, Home Assistant should begin showing charger entities. These may include charger status, charging session information, energy data, and control options depending on your charger configuration and Home Assistant setup.
Some entities may show as Unavailable until the charger has successfully connected and sent data.
Troubleshooting
My charger does not appear in Home Assistant
Check that:
Your Home Assistant system is turned on
Your EVOS charger is connected to the same network or can reach your Home Assistant URL
The OCPP integration is installed and running
The OCPP port is set to
9000The URL sent to EVOS starts with
ws://orwss://The URL does not use the normal Home Assistant port
8123Your router or firewall is not blocking port
9000
Should I use ws:// or wss://?
Use ws:// for most local Home Assistant setups.
Use wss:// only if you have set up Home Assistant with SSL/HTTPS and have enabled secure connection in the OCPP integration.
Can I use my Home Assistant Cloud or Nabu Casa URL?
For most local charger integrations, we recommend using your local Home Assistant address, such as:
ws://homeassistant.local:9000
or:
ws://YOUR-HOME-ASSISTANT-IP:9000
Only use a remote or cloud URL if you have specifically configured your network, SSL certificates, and WebSocket access for OCPP.
I changed my Home Assistant IP address
If your Home Assistant IP address changes, your charger may no longer connect.
We recommend setting a fixed IP address or DHCP reservation for your Home Assistant device in your router settings.
If your Home Assistant address changes, send the new OCPP URL to EVOS so the charger settings can be updated.
Important Position on Home Assistant
EVOS chargers can connect to a customer-managed Home Assistant OCPP endpoint.
EVOS can update the charger settings so the charger points to the customer’s nominated OCPP URL. However, the Home Assistant setup, OCPP integration, local network configuration, automations, dashboards, and ongoing Home Assistant management remain the responsibility of the customer.
EVOS does not manage or support the customer’s Home Assistant environment, but we can assist with updating the charger’s OCPP endpoint once the customer provides:
Their EVOS charger serial number
Their Home Assistant OCPP URL
Need Help?
EVOS can help point your charger to your nominated Home Assistant OCPP URL.
To do this, please send EVOS:
Your EVOS charger serial number
Your Home Assistant OCPP URL
Please note: Home Assistant is a customer-managed platform. EVOS does not configure, manage, or troubleshoot Home Assistant, the OCPP integration, customer networks, routers, firewalls, dashboards, or automations.
If you are unsure how to configure Home Assistant, we recommend checking the Home Assistant community documentation or asking an experienced Home Assistant user or installer for help.
Related


